How to add a single property boundary
This article describes how to add a property boundary for a single record. If you are looking for how to import several property boundaries at once, navigate to Using the Portfolio Importer.
You can add a single record boundary in 3 ways:
Start from the record that will contain the boundary. You cannot edit or add a boundary that is not the record you're in.
Method 1: Draw the boundary
- Click the edit button in the map toolbar
- Click the "draw areas" button
- Click to draw on the map
- Click "Save" to commit the edits
Method 2: Import the boundary (more: How to import a shapefile into a record Landscape)
- Click the edit button in the map toolbar. Select 'Boundary Layer,' NOT 'General Layers.'
- Click the import button
- Import a polygon file (if you are receiving the file from someone or downloading a file, be sure it is a Shapefile or KMZ of the property area/polygon)
- Click "Save" to commit the edit
Method 3: Copy from a Custom Map Layer
See Creating a property record for more information about all the steps of creating a new property record and adding data.
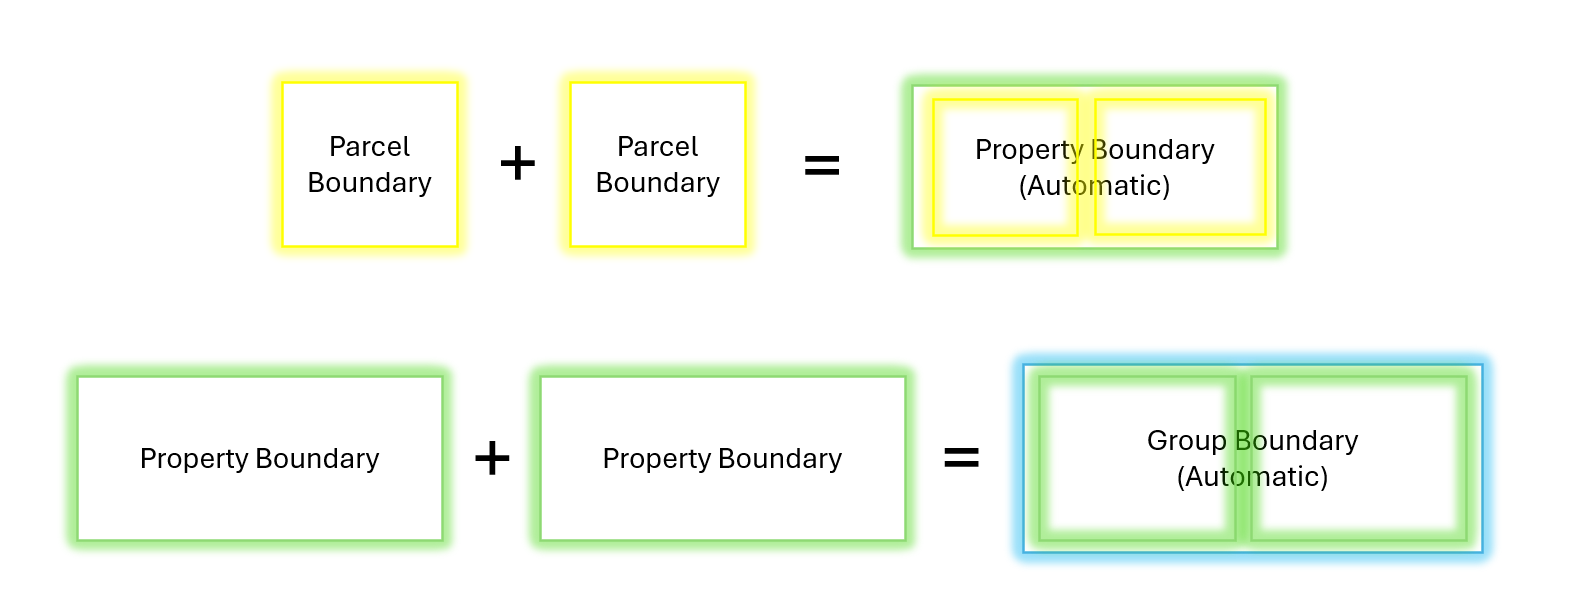
Importing a complex record boundary (Group or Property that contains Parcels)
The boundary of a record that contains other records (like a Group or a Property with Parcels) is drawn automatically from its sub-components. In other words, you need to navigate to the sub-records and upload each one individually. The boundary of the parent record will then be automatically drawn.
For more information, see the article 'How boundaries work in Landscape.'